An American Classic
June 2008
Ken Johnson
For some time I have been interested in making a copy of a
table I saw at the Museum Fine Arts in
After much effort to get as accurate information on size, details of turnings, and structure, I began this project in 2008.
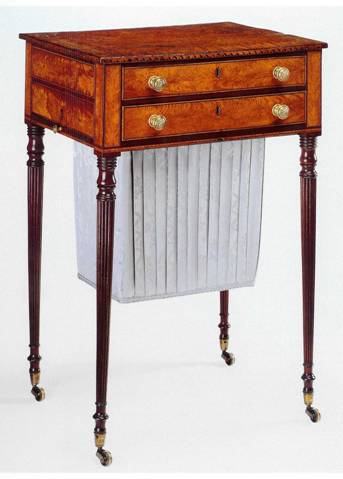
This is Photo of piece attributed to Thomas Seymour, to see mine, go to the end of this discussion
I have extensive supply of veneer and experience in laying up and gluing. But my experience in turning and reeding this type leg is limited. So I knew that would be the challenge for me.
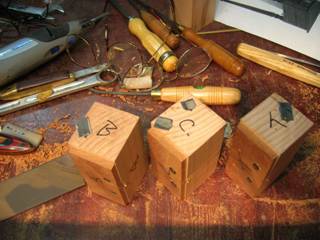
Turnings
While I enjoy turning, I am not the best. I had very little experience with turning a long, slender leg that is required for this project. I enlisted the help of a good friend, Nick Cook, who is an excellent turning and teacher. With his help, and many practice attempts I felt secure in beginning my project.
Of course, turning 4 identical legs was another requirement.
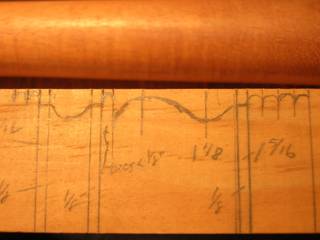
I used pattern drawings to help with the effort.
Home made ones seem to be the best.
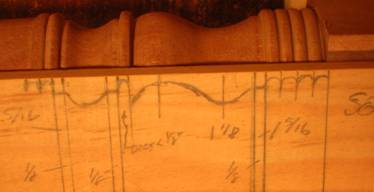
Here is a completed section with the pattern. There were only three depths of the turning, making it easier to turn. The beads at the top were defined by the size of the home made tool.
The legs turned out satisfactorily. I was able to produce 4 good samples and then ready for the reeding process.
Top of leg:
 I
built home made turning tool for the beads since they were less than 1/8”
and my skills with a skew are not sufficiently good to handle making the beads
with the skew.
I
built home made turning tool for the beads since they were less than 1/8”
and my skills with a skew are not sufficiently good to handle making the beads
with the skew.
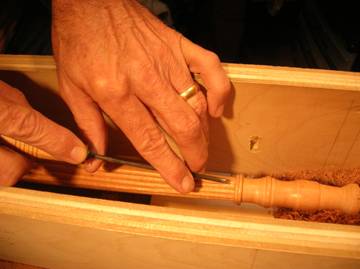
Reeding
I was able to find an indexing wheel to use on a home made system to manually reed the legs. Using the methods recommended by Al Breed using old hack saw blades for the scrapers and a block of hardwood for the handle. The block just fit inside the frame of the reeding set up, thereby allowing for consistent registry of the cutting edge.
It took a little effort to center the cutter in the block.
The support system was build to handle these specific legs, and might be useful on other projects, but was not a consideration in the design.
 The
picture includes the scraping block for the top section of the reeding
process.
The
picture includes the scraping block for the top section of the reeding
process.
I used 3 blocks with cutters of different radius. One for the top, center, and bottom section.
I then used additional scrapers held by hand to clean up and complete the transition.
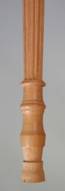
In the photograph the last reeding is shown after the use of the scraper, and prior to the clean up with carving tools, and hand held scrapers.
The other sections have been cleaned up with tools, but not sanded yet.
The tools I used for the reeding..
 This
is a close up of the scraper mounted in the “handle” block. I used old hack saw blades. I used a dremel tool and angled the
contour like the a cutting tool.
This
is a close up of the scraper mounted in the “handle” block. I used old hack saw blades. I used a dremel tool and angled the
contour like the a cutting tool.
I would resharpen the blades at least once while doing each leg. I used a gouge stone to touch them up.
The hand held scrapers are shown sitting on top of the block scrapers.
Cleaning up the ends of the reeding with a carving tool:
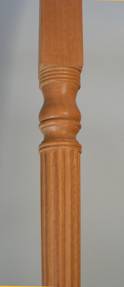
The reeding completed on the leg(top and bottom sections).
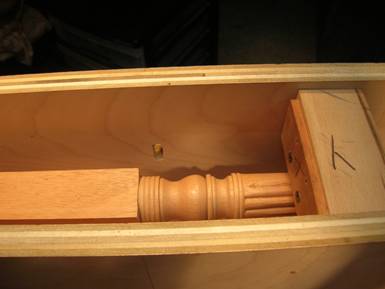
Completed legs:

Laying Up Veneer
August/October 2008
The veneered surfaces for the sides and top were laid up as a single sheet and then applied to the substrate. This allows for an easier method of affixing the intricate borders and banding.
Painters blue tape is used to hold the individual pieces in place until the entire section is complete. Then veneer tape is applied to the face side of the assembly.
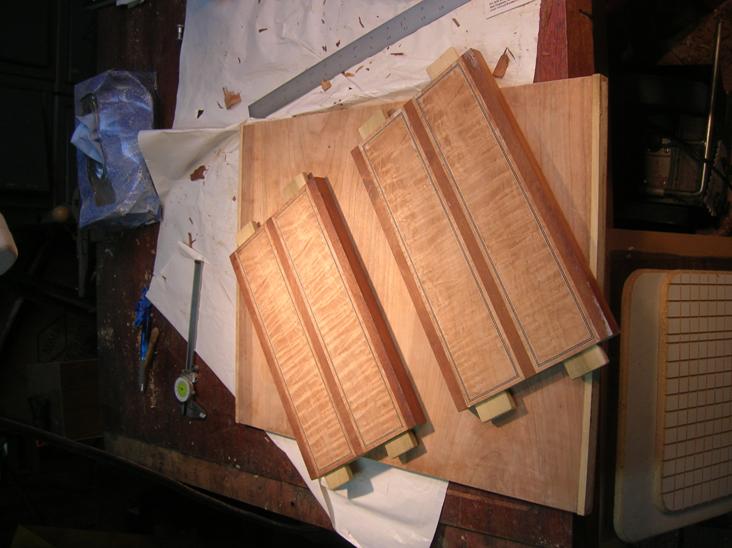
The parts to be assembled for the veneered surface of the sides(note, blue tape is being used to hold the seam on the drawer fronts):
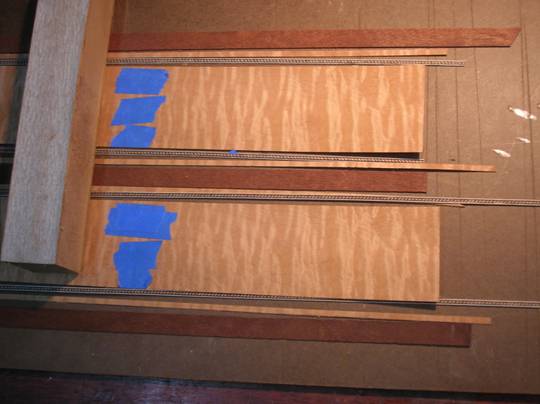
The tape up process of the parts:
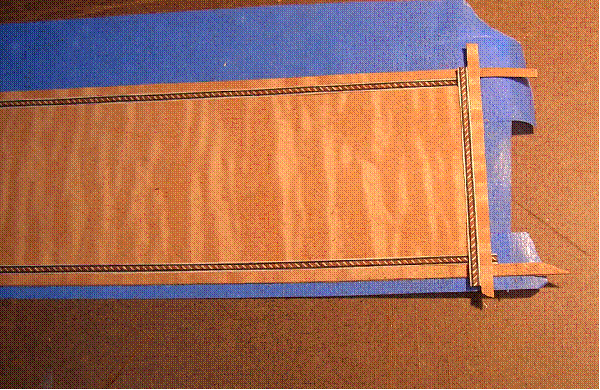
The completed veneer face lay up with white veneer tape applied to the face:
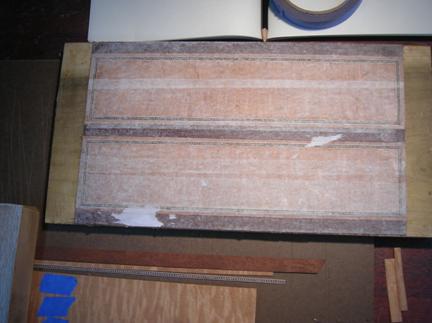
I used a vacuum press and hide glue to apply the veneer. I also applied a balancing veneer to the opposite side of the material. Given the size of the sides and back of the case, this was strictly not required, but that is my general approach if there is any doubt.
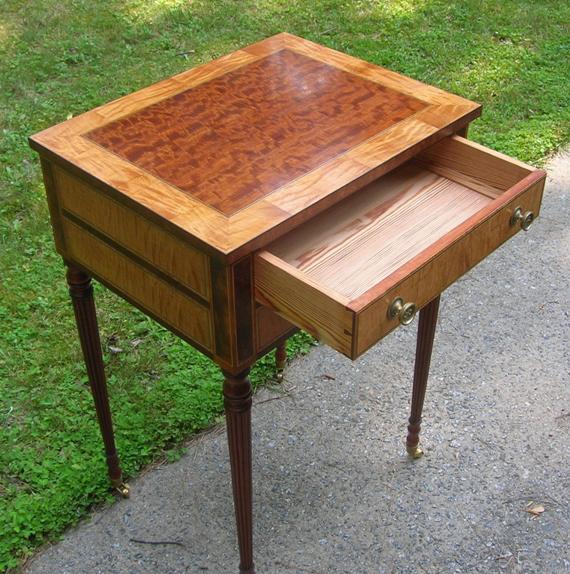
The glue side of the top veneer face lay up: Top is Makore
and Western Red Maple. T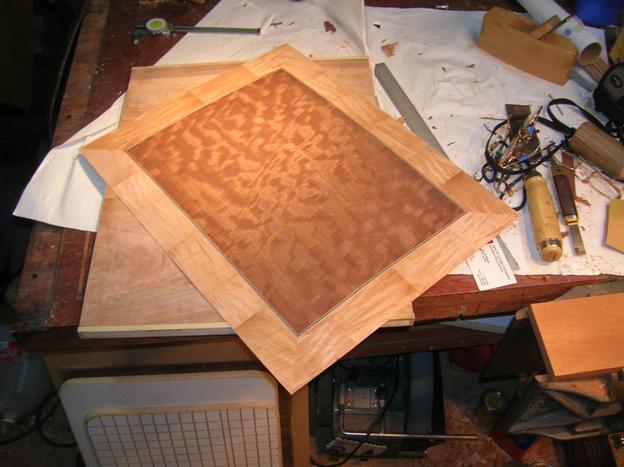
The sides after glue up to substrate, removal of white veneer tape and tenons cut.
Drawers Winter 2009
I used heart pine for the secondary wood on the drawers,
being mostly grown in the South and
It is somewhat brittle and I find it difficult to work with. It however looks really nice in this application. Since the sides were approximately 9/16” thick, I chose to put a decorative molding that doubled as extra material for the dado for the drawer bottoms.

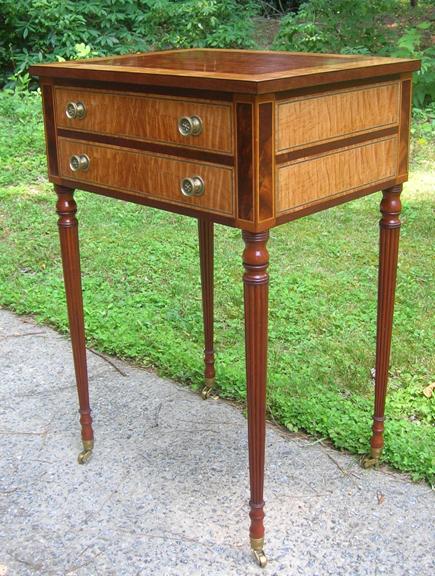
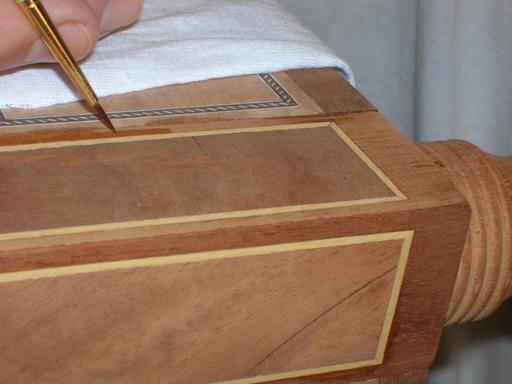
Decoration for the Legs and Top
A simple inlay was placed in each of the sides of the squares of the legs at the top. Crotch mahogany was used with a satinwood string banding.
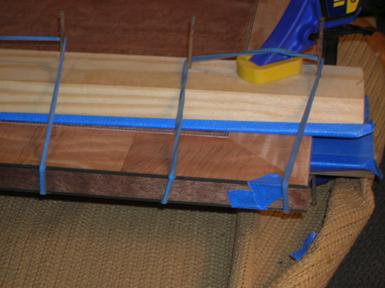
Trimming the Edge of
Top
A 1/16” square of ebony was used to trim the edges of the upper and lower edges of the top. These were held in place with a rubber band tension as shown below.
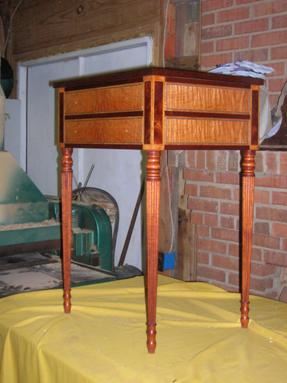
Assembled Table Spring 2009
Finishing
Spring 2009
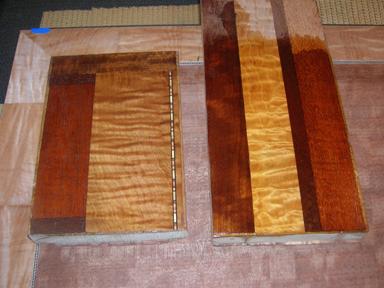
I am a fan of chemical mordant for finishing. The legs were of a lighter color of mahogany than I would have preferred, the use of potassium dichromate( POTASSIUM DICHROMATE IS A DANGEROUS MATERIAL. DO NOT USE IT WITHOUT PROPER EYE AND SKIN PROTECTION, PROPER VENTALATION AND ONLY AFTER EVALUATING THE HEALTH RISK. IT IS A KNOWN CARCINOGENIC) darkened the legs to a nice rich color without sacrificing detail or grain quality. I prefer to allow the natural finishes to fill the grain. I know this is not what was done originally, but I like some grain appearance. Much of the wood in this project is so tight grained that it would have had little difference anyway.
Ultimately, I chose to only apply the potassium dichromate to the legs and not the other woods. This was done with a small artist brush. This was not as difficult as I had thought.

This shot shows the impact of the differences as can be seen on the side(has potassium dichromate) versus the top surfaces(where solution is being applied).
The first sample(on the left) involved the use of a stronger potassium dichromate and burnt umber glazing. I found it too dark and hid the color of the highly figured woods.
The finish procedure was:
- Wet surface to raise the grain
- Dry sand with fresh 400 grit paper to remove raised grain
- One coat of tung oil to help highlight the grain
- Three coats of blonde shellac
- Wet sand with mixture of tung oil, boiled linseed oil and mineral spirits
- Two coats of “yellow” shellac on the top and side surfaces, and two coats of blonde on the legs.
- Wet sand with 400/600 and mineral spirits mixture
- Rub with 3M hand polish compound
- Wax with antique brown wax
In the Shop before
the Brass is Attached:
Close Up of Drawer Pulls – From Londonderry Brasses, LTD

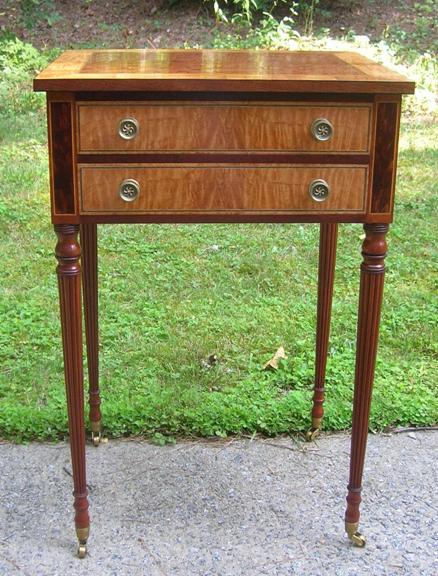
The completed table stands 29 3/8” high, the top is 15 ½” deep, and 19 3/4 “ wide. And the final results are in……